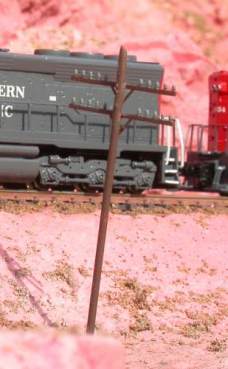
Instruction 3RWorks Telegraph Poles
 This kit contains only the arms for telegraph poles. Our recommendation for the
pole is 1 mm brass wire. With brass wire you can either solder or glue the arms to
the pole. An other possibility is to glue the arms to a plastic or wooden rod. This kit contains only the arms for telegraph poles. Our recommendation for the
pole is 1 mm brass wire. With brass wire you can either solder or glue the arms to
the pole. An other possibility is to glue the arms to a plastic or wooden rod.
The following tools and material are required for this kit:
" Fine soldering iron, max. 25 W or alternatively
" CA glue, use the jelly type
" Set of needle files
" Hobby knife or
" Goldsmith scissors
" Fine flat nose pliers
" Fine soldering tin with roisin core
" Flux, recommended is roisin /spirit mix
" Metal primer
" Hobby paint
" Safety glasses and Aspirating protection
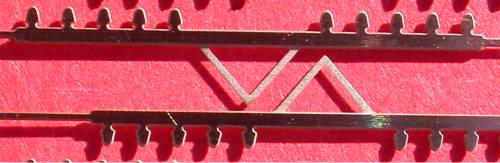
Front side telegraph arm, the brackets are etched to half thickness.
Before starting to work on your kit be aware of safety! Wear safety glasses during all cutting or grinding operations.
Wear aspiration protection when handling with paints and solvents.
1. Carefully cut all parts from the sheet. Remainders of the sprues should be removed with the file.
2. Now solder or glue the arms to the mast. Put the non-etched side of the bracket to the pole. If you want to fix
two or more arms to the pole a fixture for the arms and the pole made from cardboard will aid you.
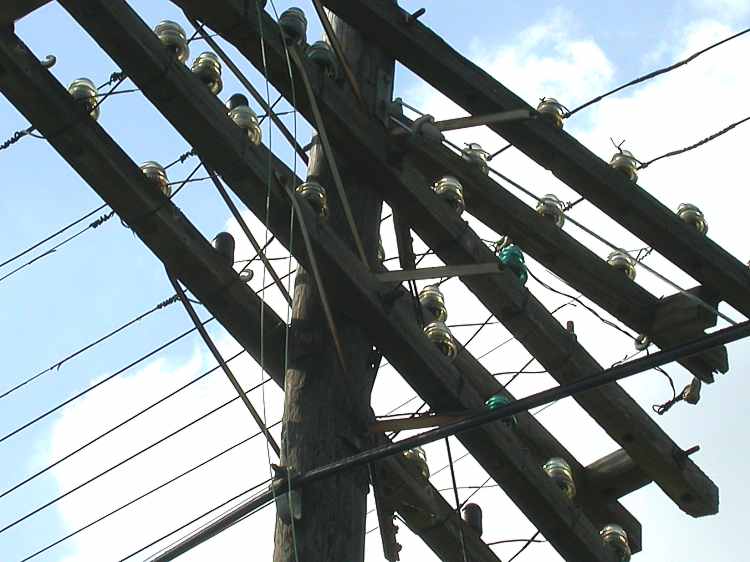
3. Now the complete telegraph pole needs to be cleaned, de-greased, primed and painted. American insulators are
commonly of a greenish colour. The mast is normally made of wood which can vary in colour from black to brown to
grey, depending on wheathering.
Enjoy your model!
|