Instruction Tank Car Kit 30' and 50'
3RWorks kit Tank Car, 1:220
This kit contains the following material:
1 tube, aluminium
2 bolster pins, brass
1 vent, brass
1 main dome, brass
1 pin, safety valve
2 elliptical ends
1 weight
1 etched sheet, nickel silver
2 drill templates
1 set of decals
You will also need:
1 pair of MTL couplers 905
1 pair of MTL Roller Bearing trucks without coupling
For this kit you need the following tools and material:
" Set of needle files (round and flat)
" Sharp knife or goldsmith scissors
" Good paper scissors
" Small machine vise
" 2 Fine flat nose pliers
" Fine flat screw driver
" Hammer
" Punch marker
" Round wooden toothpicks
" 2 wooden clothes pins
" Sand paper 320, 600 and 1000 grid
" A pair of tweezers
" Steel drill 0,7; 0,8; 1,3; 2,0; 2,5 mm
" Tap 00-90 (thread is already pre-cut)
" Metal primer
" Fine plastic putty
" Hobby paint
" Fine soldering iron, max. 25 W
" Fine soldering tin 0,5 mmwith rosin core
" Flux, recommended is rosin
" CA superglue jelly, adhesive film
" If necessary magnifying glass
" Safety glasses" Airbrush equipment
Building instructions:
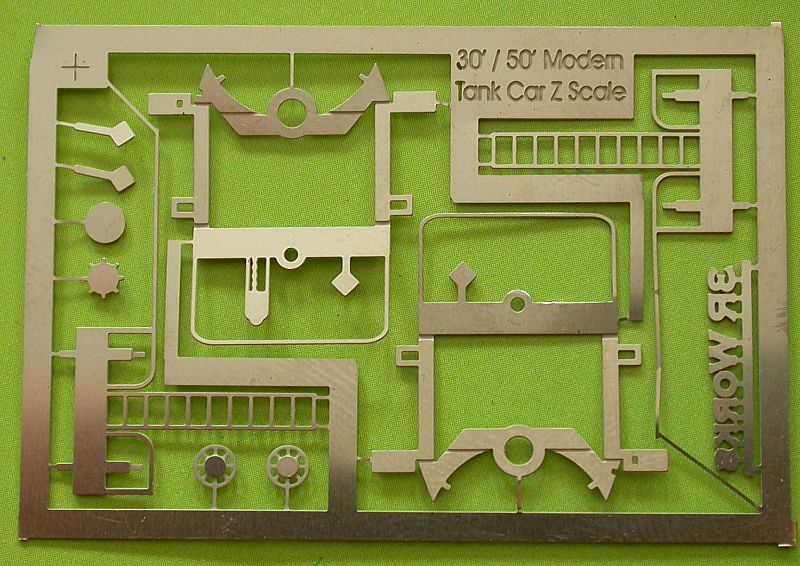
1. Carefully cut the 4 main parts from the sheet. Remainders of the sprues should be removed with the file. Attention:
the long end of the railing on the upper platforms has a predetermined bending point with an attached solder tail at the
end - do not cut this!
Remove the remainders of the sprues with a file.
The smaller parts remain on the card until they are needed.
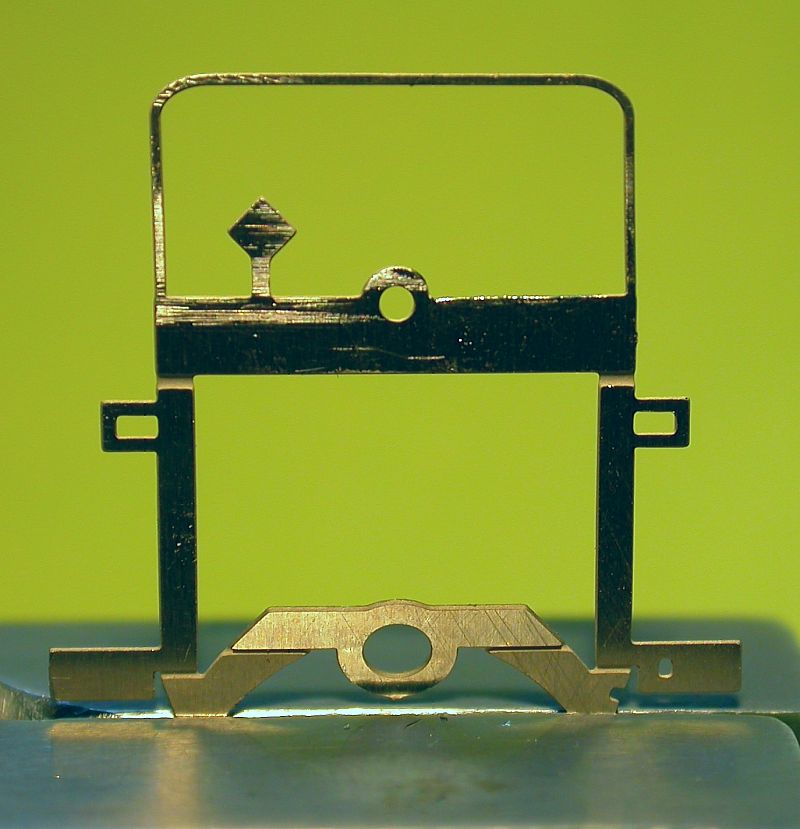
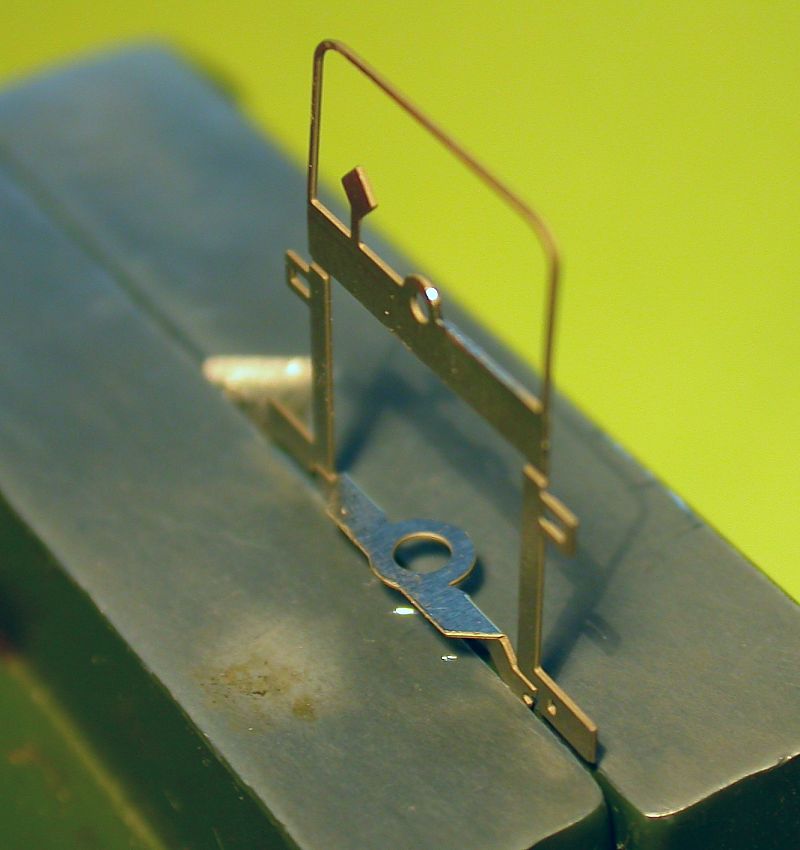
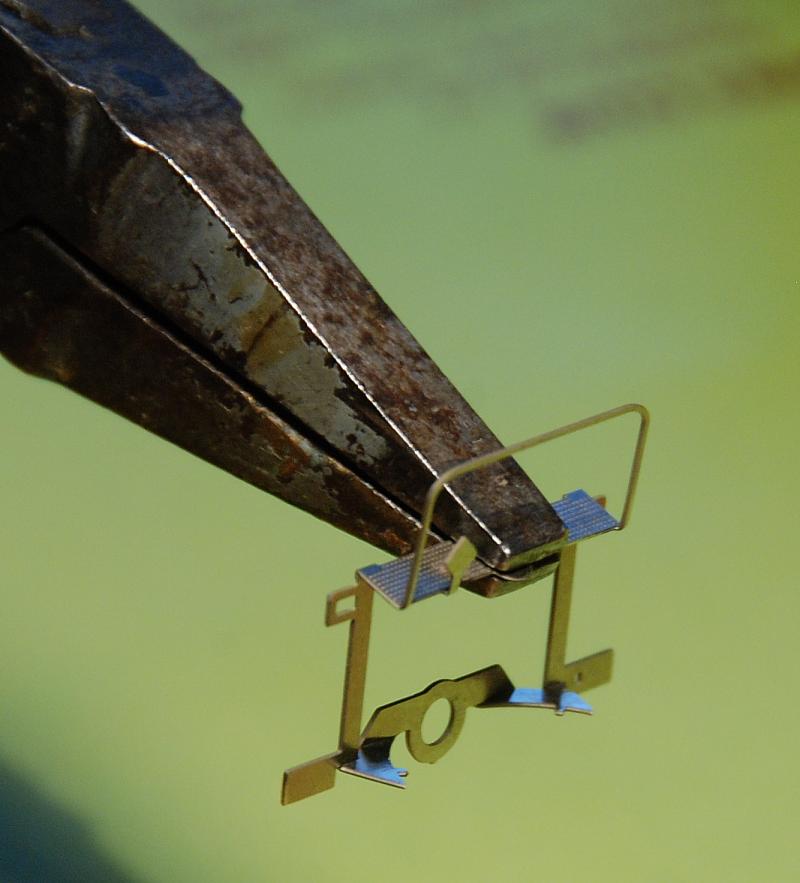
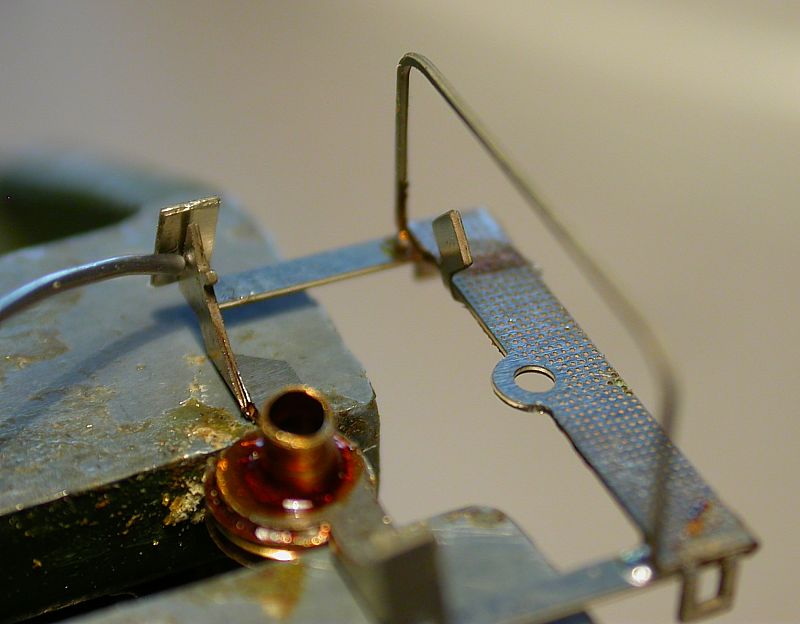
2. The next step is to bend and solder the end platforms. For this purpose you have to clamp the platform into a vise
with plain jaws (see photograph). It is important that the round socket is still above the vise to be able to bend it.
3. The next step is to bend and solder the end platforms. For this purpose you have to clamp the platform into a vise
with plain jaws (see photograph). It is important that the round socket is still above the vise to be able to bend it.
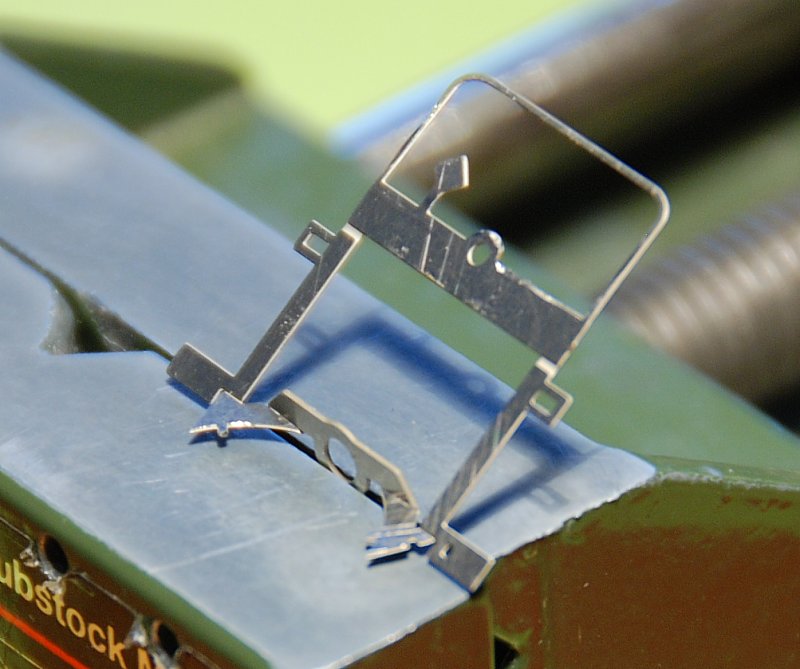
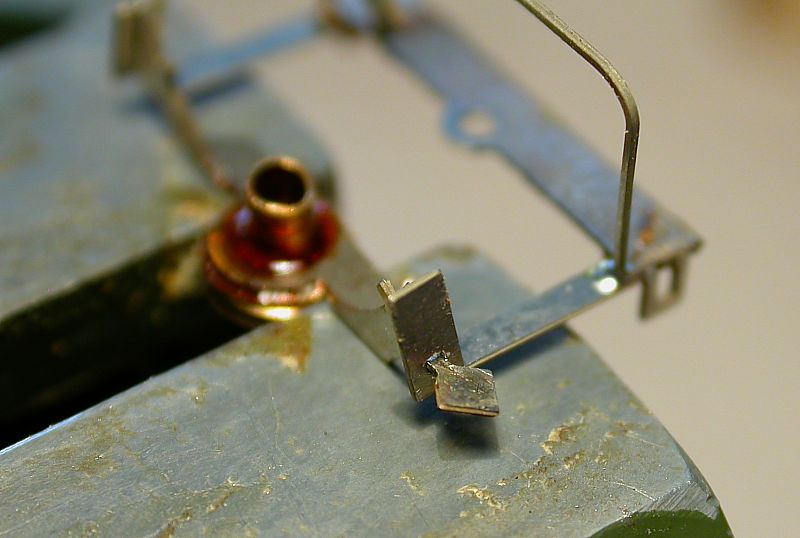
4. Now clamp the socket for the bolster pin.
Attention: the outer supports must not be clamped! Now bend by 90°.
5. Clamp the end platform with railing in the vise and bend by 90°.
6. Now bend the railing by approx. 90° to the front.
It is recommended to bend both sides of the railing, the security sign and if necessary the brake together with a flat
object. Attention: The screw tag must remain flat!

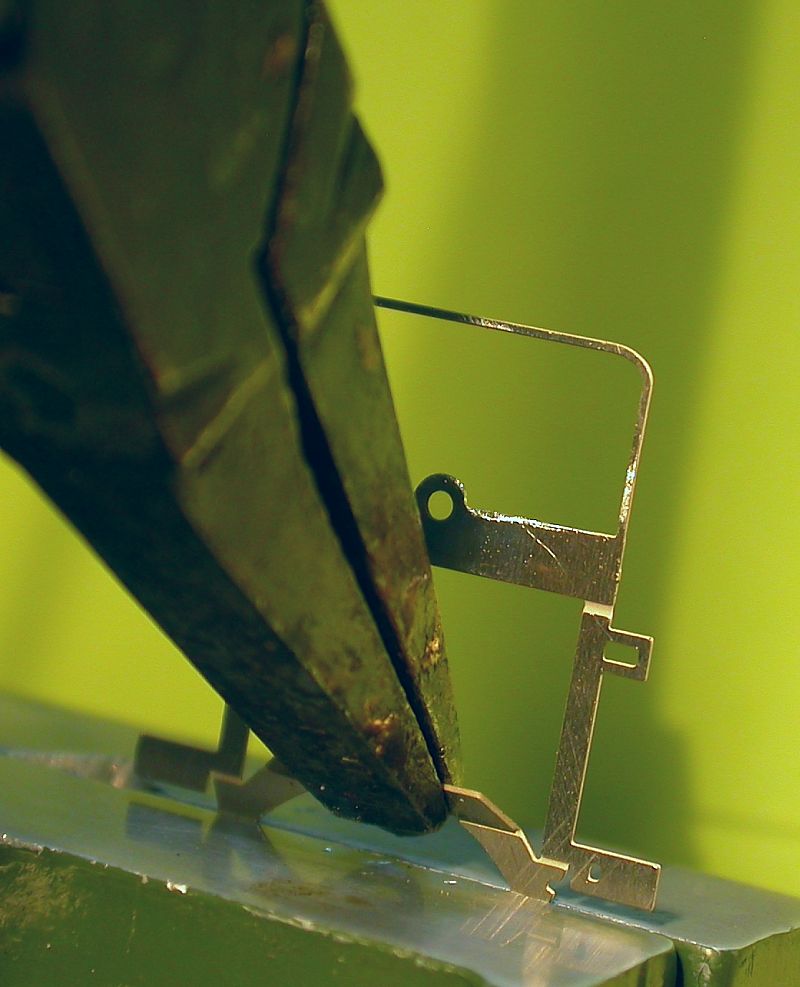
7. Bend the platform by another approx. 70° with the flat nose plier. Now press the platform to the supporters. A small
gap will remain.
8. Insert the bolster pin tentatively. In case it does't fit in perfectly, the hole must be filed out a little bit. When the pin
fits in, take it out again, brush the ring with flux and insert the pin again.
9. Now solder the bearing pin. Keep the soldering iron to the bearing pin and the soldering tin to the gap between the
pin and the platform. You can use a wooden toothpick to fix the pin while cooling down - but don't jiggle, this will cause
a cold solder joint.
10. Now here's the trick with the clothes pin:
Cut 2 wooden clothes pins at the top to be flat. Like this you can use them for bracing the end platform against the
frame. As the pins are quite cheap it doesn't matter if they get burned a little bit during the soldering process!
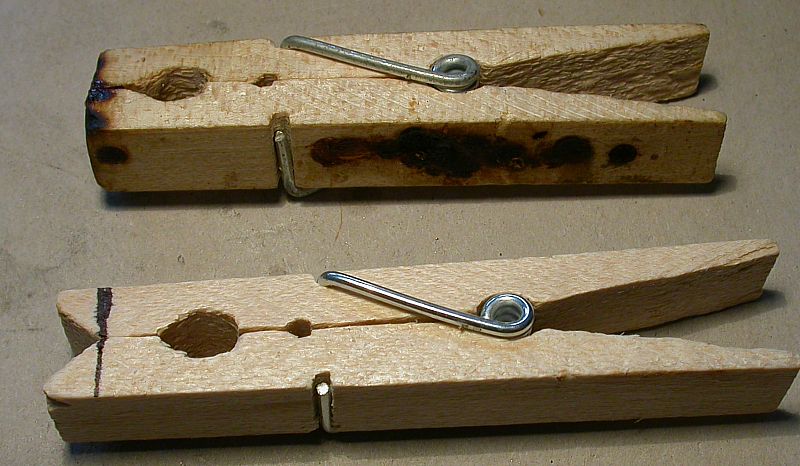
11. Solder the end platform at the points shown. Press the platform to the frame with the clothes pins while soldering.
12. Tip up the side bracings and flap down the steps by 90°.
13. Now adjust the platform again. Then solder the first bracing in the channeling. When the soldering tin is applied,
press on the bracing from the outside with a toothpick while the soldering iron is still heating from the inside. Remove
the soldering iron, let cool down andrelease the bracing.
14. Crosscut the danger sign on the other side in a way that barely a mm protrudes from the opening. The etched side
of the sign projects downward. Here, too, press the bracing with a toothpick.
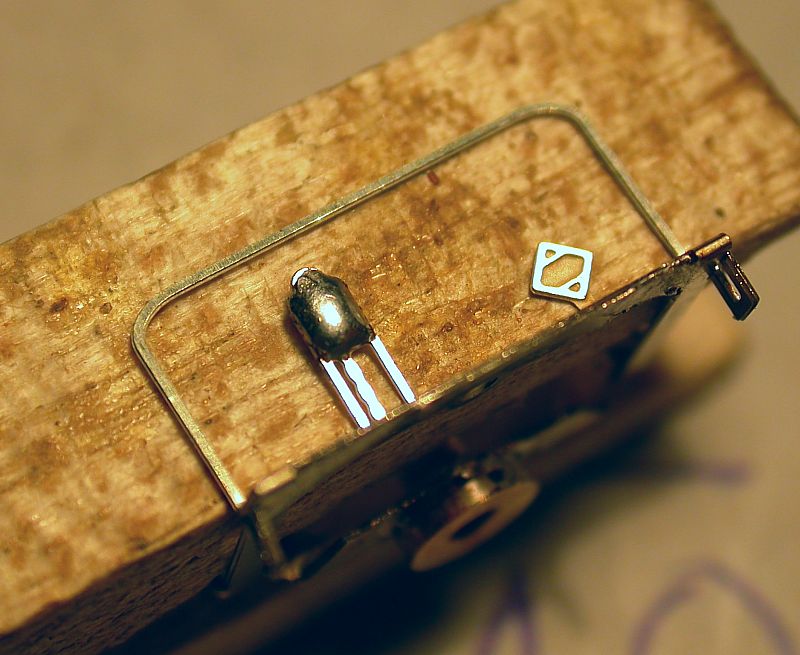
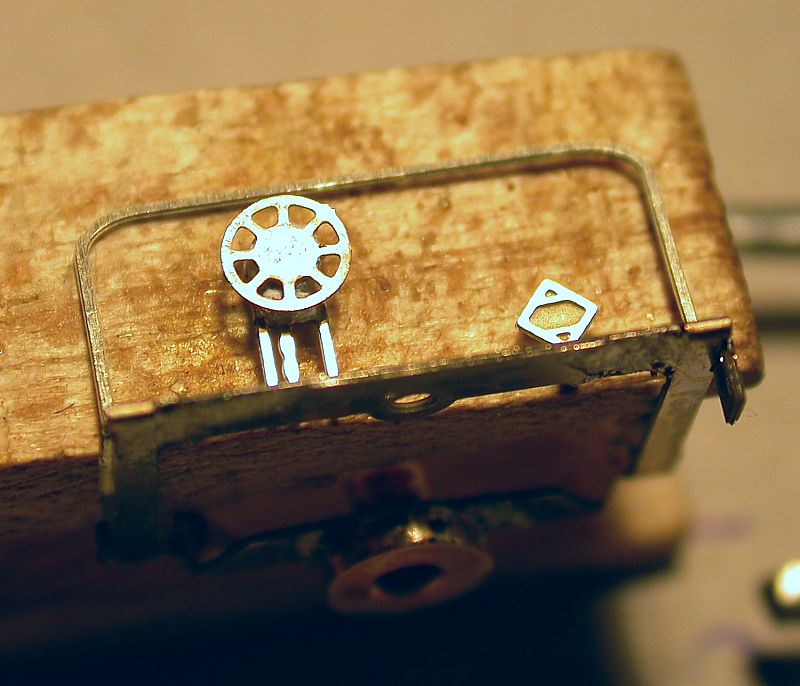
15. On a platform with hand brake you now cover the brake gear with tin to add a little volume. Then glue the hand
wheel to it.
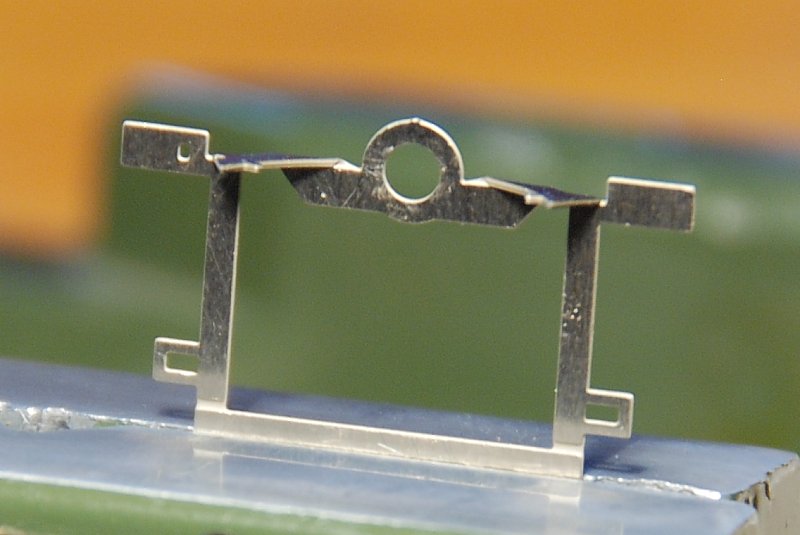
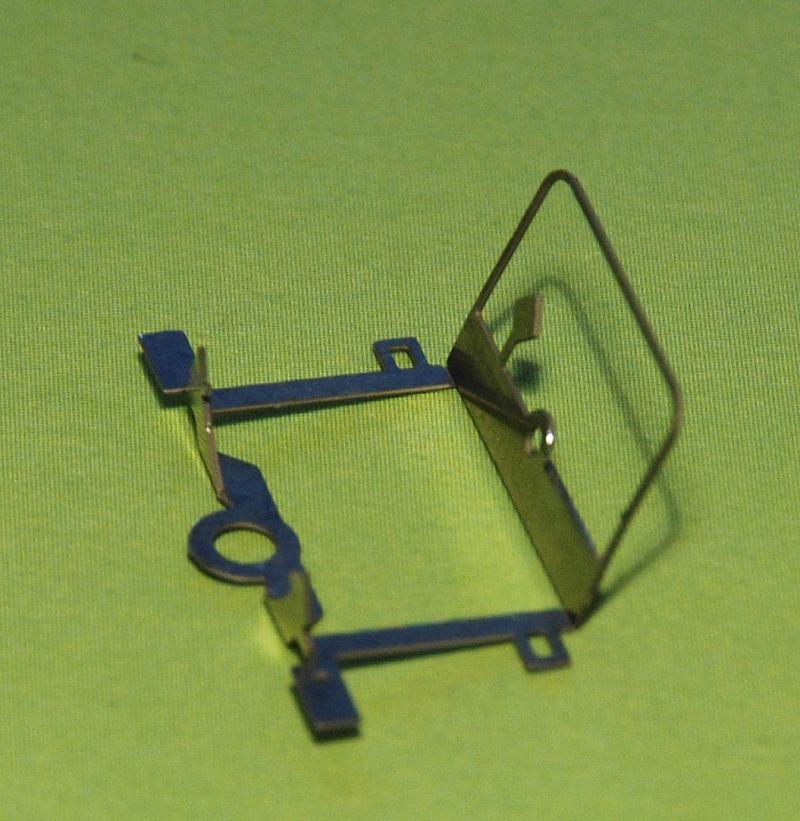
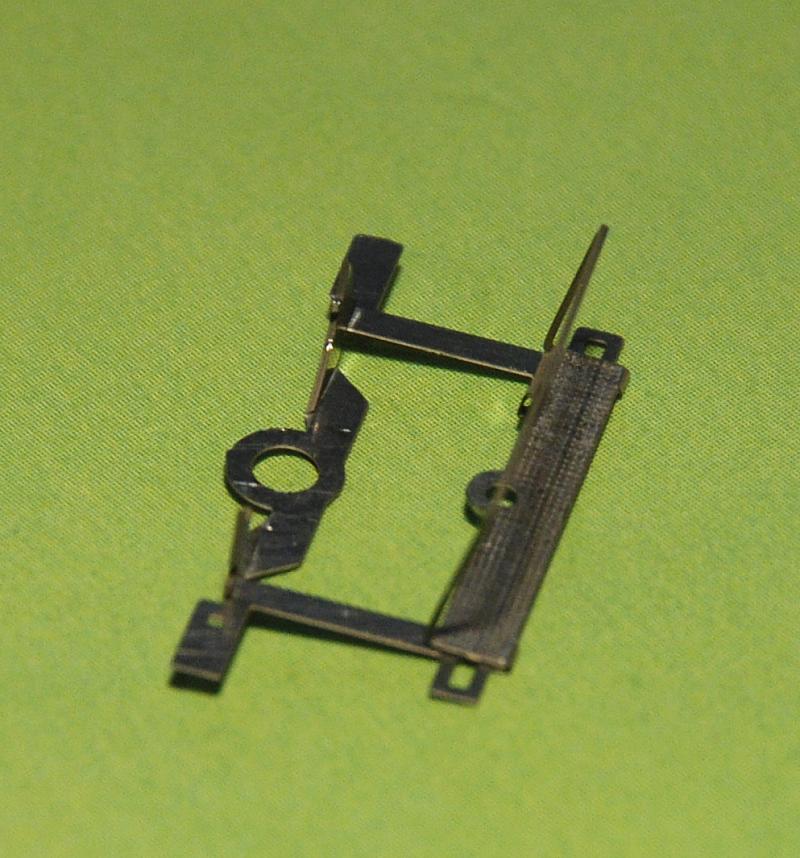
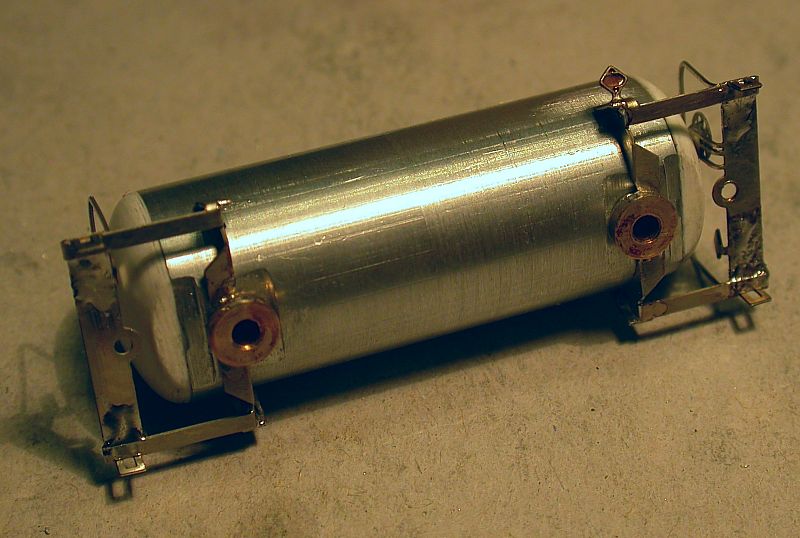
The end platforms are now ready for assembly.
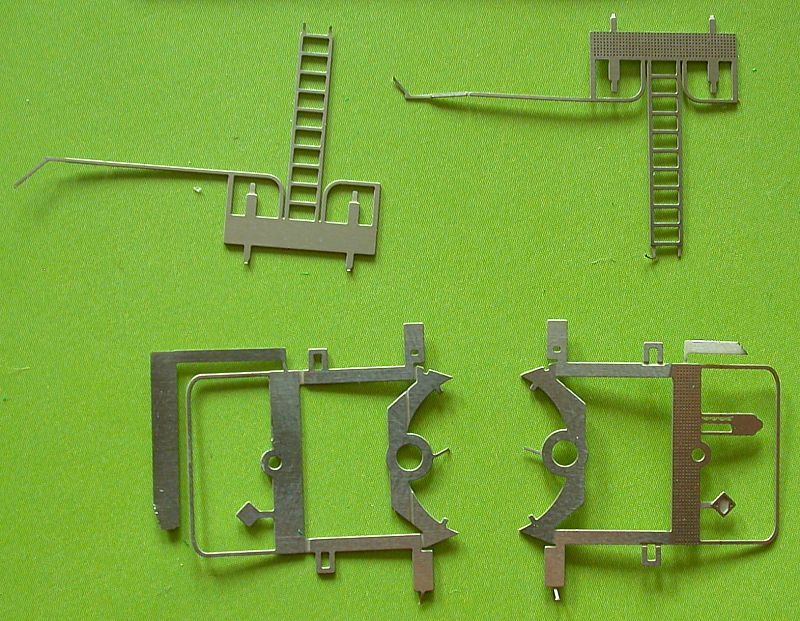
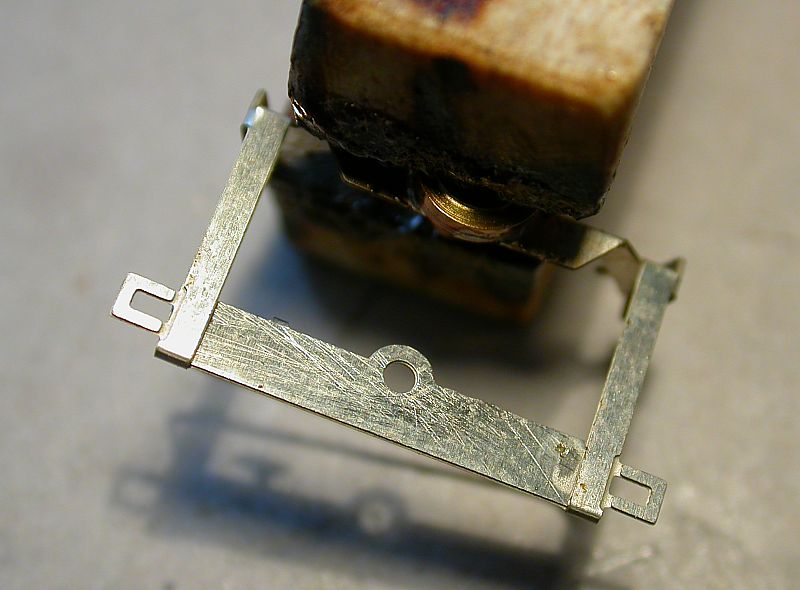
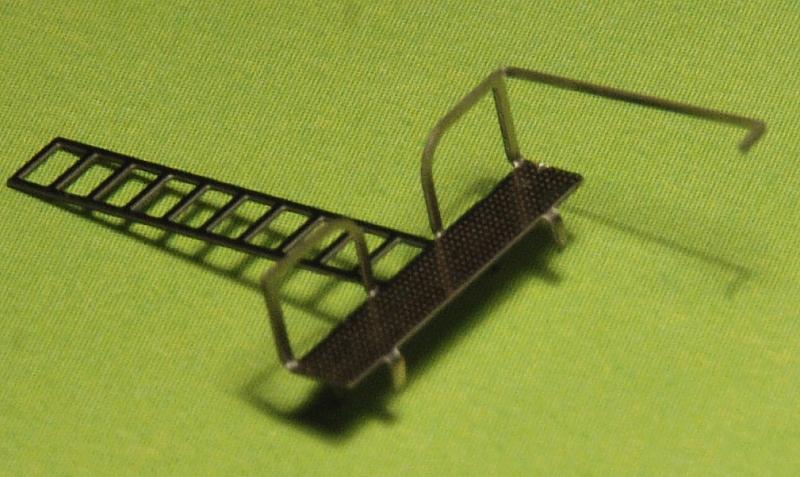
16. For the dome platform you need two halves. Both halves are identical. Clamp the half in such a way that the ladder,
railing and braces still protrude.With a screw driver first bend the braces downwards, then the railing upwards.
Remember - the corrugated side of the platform is he top side. The ladder remains straight.
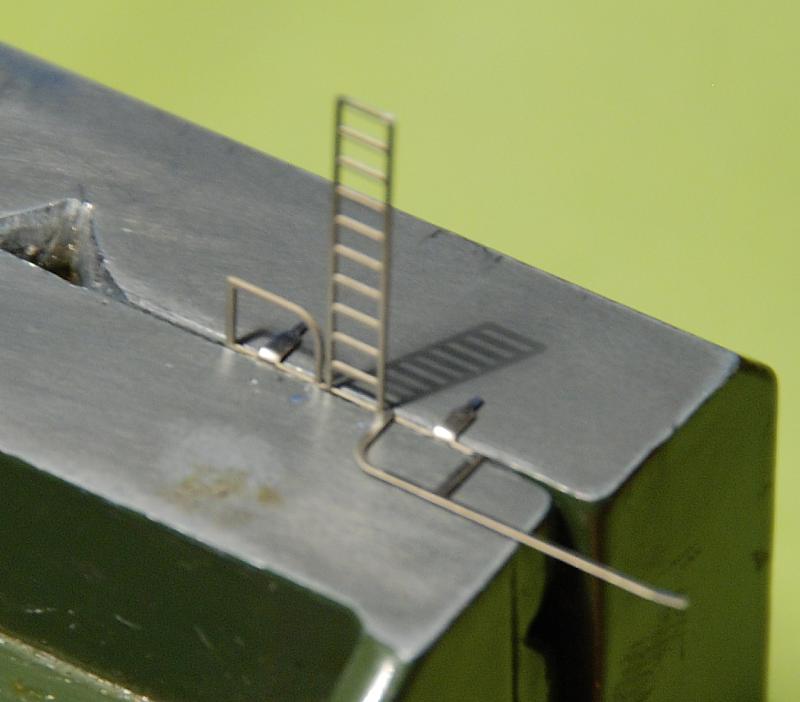
17. Bend the middle noses by 90° downwards using 2 flat nose pliers.

18. Bend the railing by 90° towards the middle and then the solder tail by another 90°
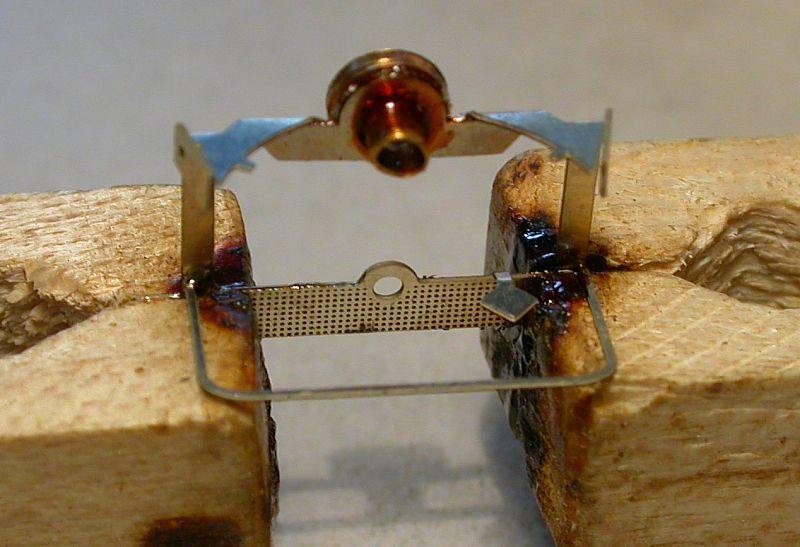
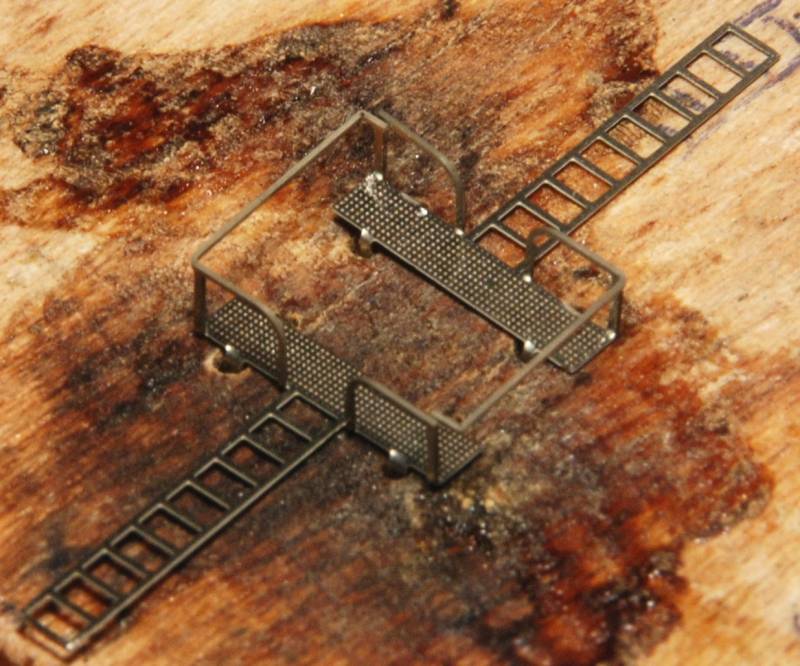
19. Using the drill template Dome Platform you can build a small apparatus from a piece of wood. You can insert 2
platforms into the 8 holes and position them for soldering. The solder joint should be very fine, therefore flux is
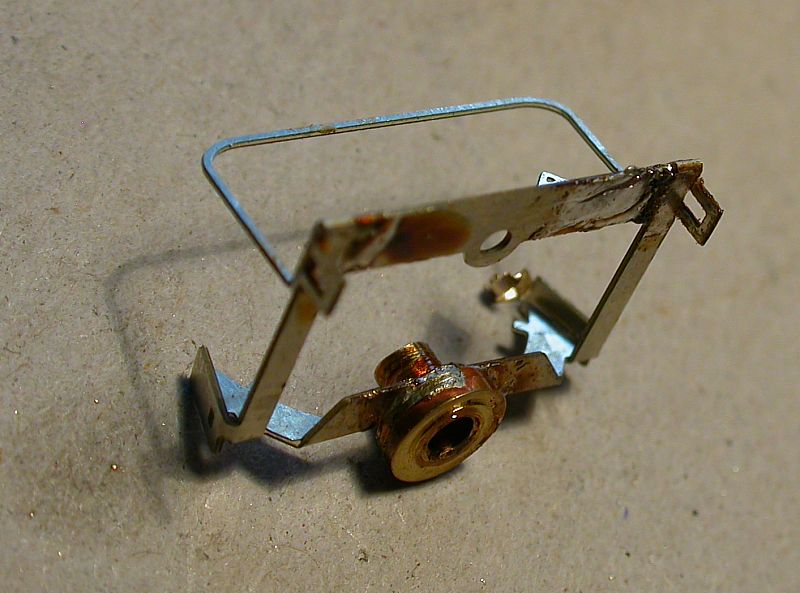
absolutely necessary. Now the dome platform is ready.
20. Now remove all remaining flux from the end platforms and the dome platform. If you have used rosin the best
dissolvent is spiritus. Remaining crusts can be removed with a fiberglass eraser.
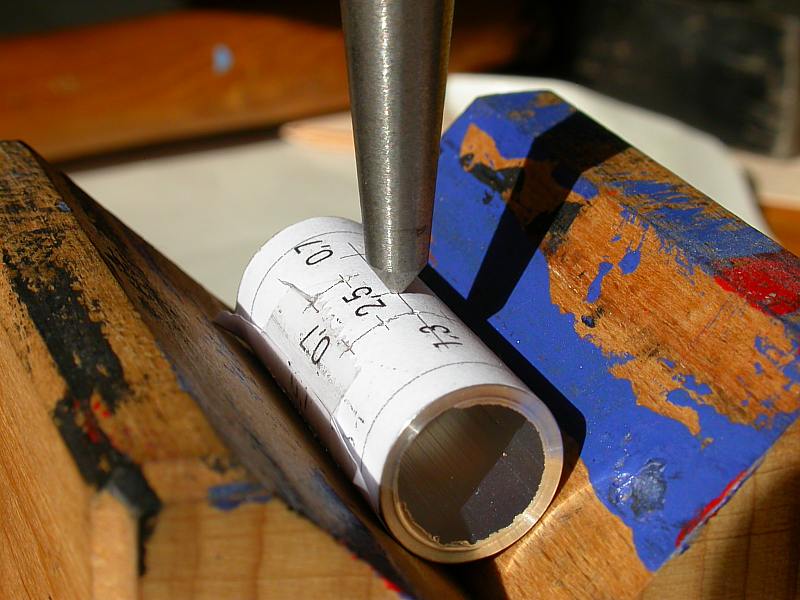
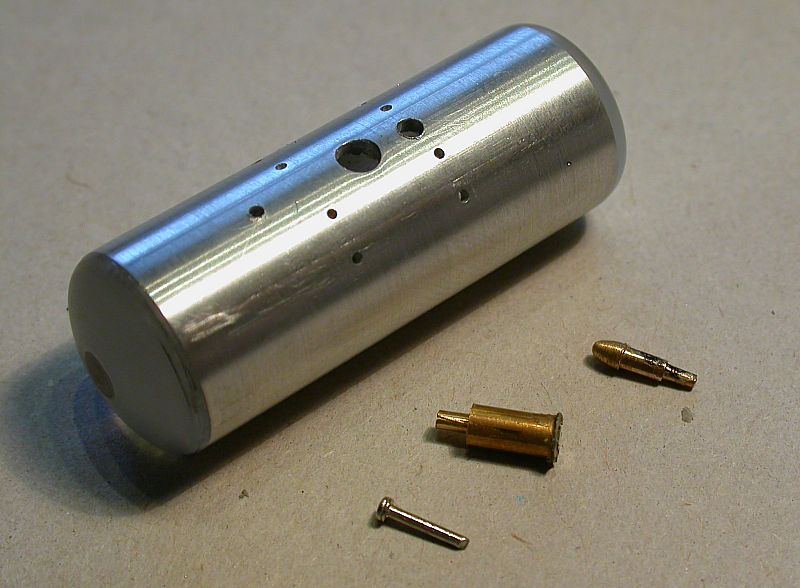
21. Fix the drill template Tank with adhesive film to the tank. Make sure that the template lays parallel and is not
twisted. The outer lines must match the edges on both sides.
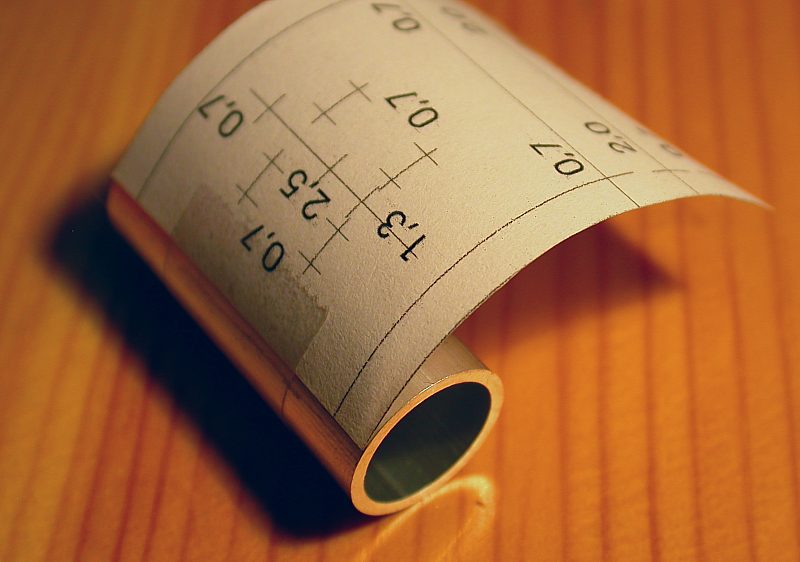
22. The drill holes must be punch-marked exactly.
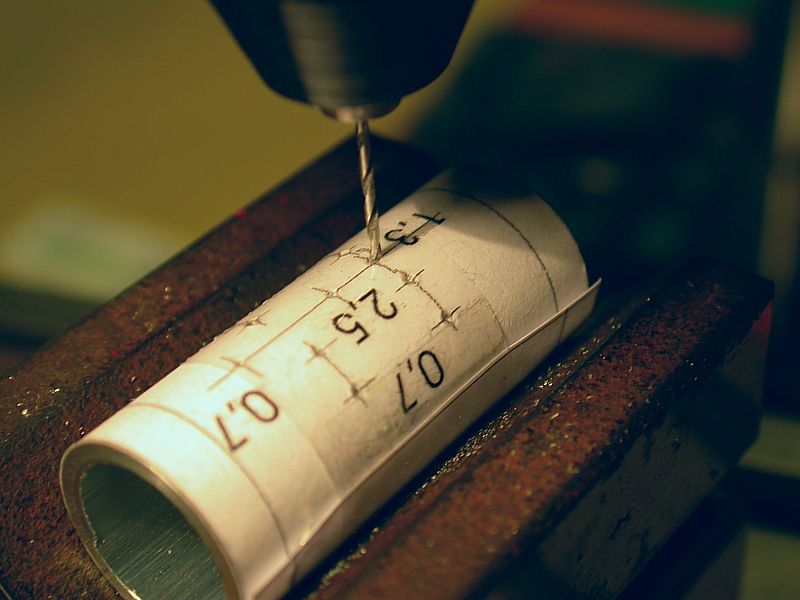
23. First pre-drill all holes with a 0,7 mm drill, then drill the holes 0.8 mm, 1.3 mm, 2.0 mm and 2.5 mm with a 1.3 mm
drill. Finally drill 2.0 mm and 2.5 mm. The stepwise drilling ensures round drill holes.
24. Glue the weight centrically to the bottom of the tube.
25. The elliptic ends have a casting sprue at the edge. File it off flat.
 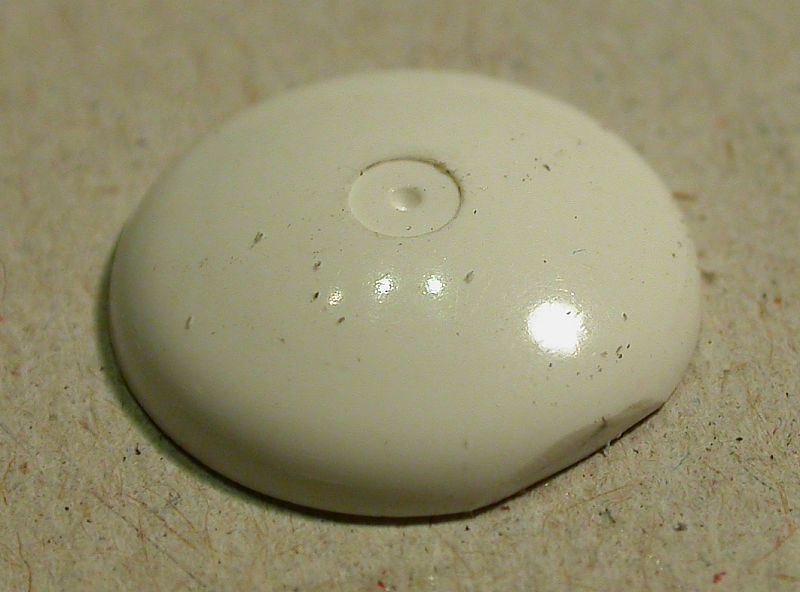
26. Glue it with the flat side downwards to the tube. To center it before the glue cures, you can roll it on a plain
surface. (Attention: glue traces - put a flat piece of cardboard underneath).
27. Now fill up the dents of the elliptic ends and any gaps or other kinks on the tank with putty. Then sand to form with
320 grid sanding paper and finish with 600 and 1000 paper if necessary.
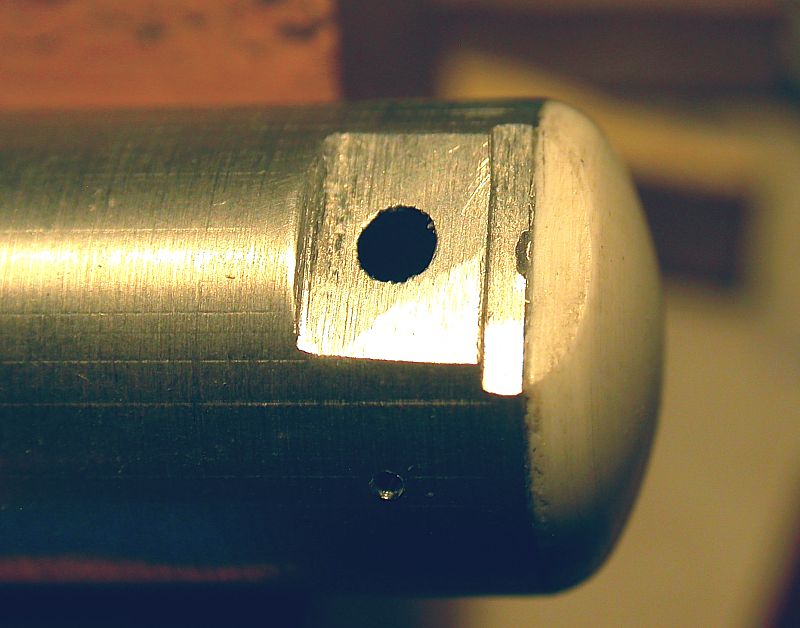
28. File plane the end of the tube in the area of the bolster pin socket. It is OK if the flattening is approx. 4 - 4,5 mm
wide. Towards the center the flattening should be a little bit more than 2 mm away from the middle of the hole.
However, the bearing pin should well fit into it. Further to the end it must be deepened a little more. You will need this
space for the coupler pocket. Here, the width is approx. 6,5 mm. Maybe the wall thickness of the tube can be
punctuated slightly. Stop at this point latest!
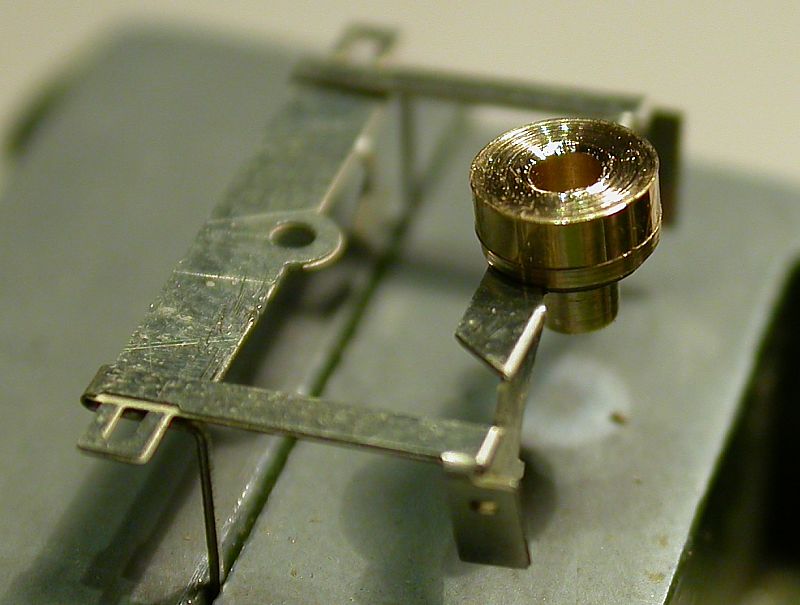
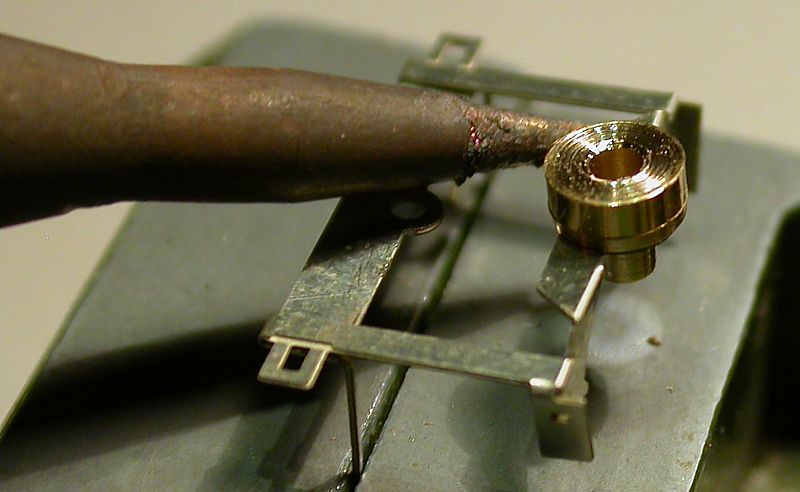
29. Now prepare the domes. Glue the dome top to the main dome (see picture), cut the pin to 4 to 6 mm length.
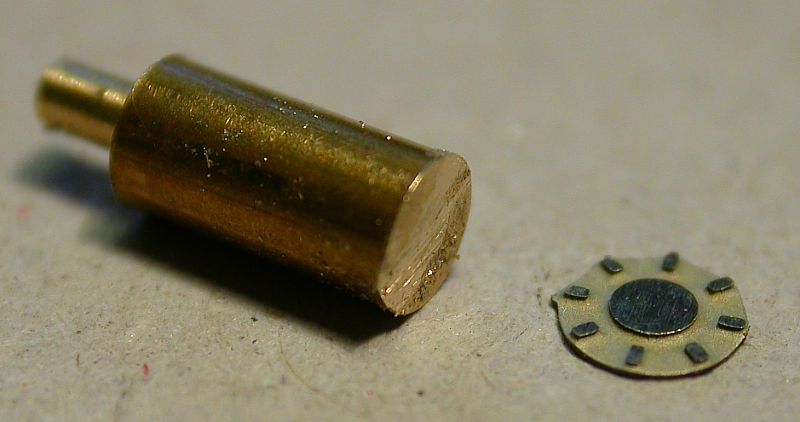
30. Glue the main dome into the 2,5 mm drill hole in the center, the trimmed pin into the 0,8 mm drill hole and the vent
pipe into the
1,3 mm drill hole. Use CA superglue jelly and remove all excess glue immediately or remove later with fine sand paper.
31. Now assemble both end platforms tentatively. The end without brake is on the side of the small (pin) dome. The
small nibs on the tank braces have to snap into the drill holes in the tank. If they don't you have to rework with a round
key file. Depending on the mismatch you have to file on the bearing pin socket or the holes for the noses, preferably as
a "slotted hole". If everything matches, you can make final corrections on the position of the braces to the tank.
32. First, insert one end platform without glue, brush the the other one with glue around the bearing pin and on the
inward brace adjoining the tank and fix it. For positioning during the cure of the glue gently press the tanker with the
bearing pins to an even surface. Treat the other end accordingly.
33. Insert the dome platform tentatively. If necessary correct the braces slightly. If everything matches, glue the
platform and bend down the ladder.
34. Congratulations! The assembly of the tanker is finished!
35. Before painting bend the railings on the ends carefully away from the tank so that they don't touch it. Otherwise
they would stick to the tank.
36. First apply a layer of metal primer. If you use solvent-containing primer there may be an incompatibility to the
plastic material of the elliptic ends. You should try this first.
Then you continue with the actual color pattern. If you use matt color you will have to apply a layer of glossy clear
lacquer before putting on the decals. Without this layer the decals would appear matt due to microscopical bubbles
between decal and surface. You can see the position of the decals on the picture enclosed to the set of decals.
37. The couplers are screwed to the eye on the end platform. Re-cut the 00-90 thread if necessary.
38. Fix the truck with the plastic pin to the bolster pin. In case the pin is to stiff, you can re-drill the drill hole with a 1.6
mm drill and file carefully if necessary. Should the pin be too smooth-going you can apply a little bit of glue to the drill
hole and let it dry. Then try it again.
These instructions are based on our experience in building a couple of dozen Tank Cars. However, should there be any
questions or ambiguities we are happy to help you!
Have fun with the model!
3R Works
Gutenbergstrasse 5A
D-88677 Markdorf
Threerworks@aol.com |