Instruction 3RWorks Aermotor
3RWorks kit 3RWorks kit Cattlepen, 1:220 Z scale

The following tools and material are required for this kit:
" Fine soldering iron, max. 25 W
" Set of needle files
" Hobby knife or
" Goldsmith scissors
" Fine flat nose pliers
" Fine soldering tin with roisin core
" Flux, recommended is roisin /spirit mix
" Metal primer
" Hobby paint
" Safety glasses and Aspirating protection
Before starting to work on your kit be aware of safety! Wear safety glasses during all cutting or grinding operations.
Wear aspiration protection when handling with paints and solvents.
The first step is to get an overview about the components of this kit. All parts are etched at one single sheet:
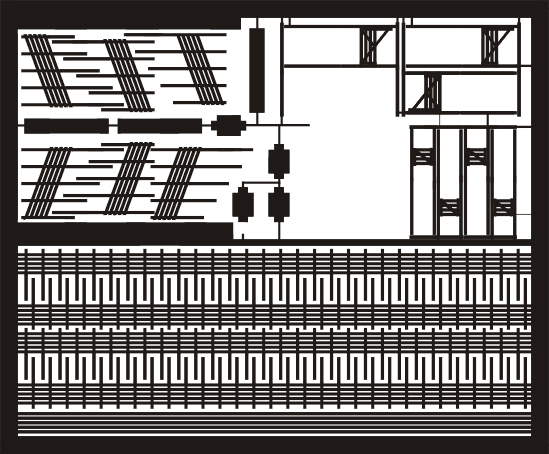
Ramps, gates, trough
Fence
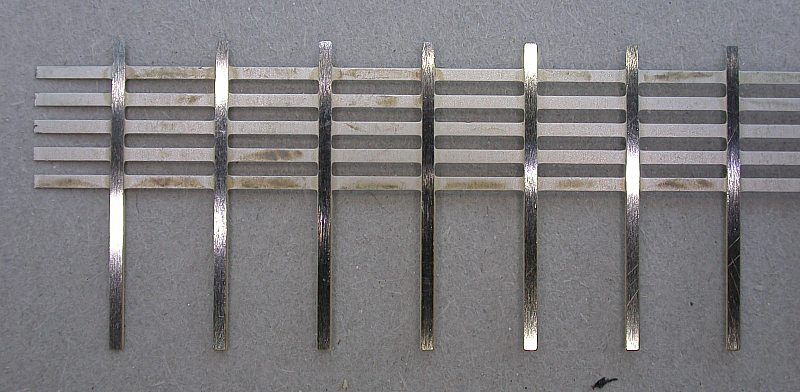
1. Carefully cut all parts from the sheet. Remainders of the sprues should be removed with the file. It is
recommended to cut the parts just before the assembly.
2. This kit is designed for a flexible design of a cattlepen. You can use the picture above as proposal or get
inspiration from prototype pictures. The core components are the fences. You should draw a plan of your cattlepen
first before starting assembly.
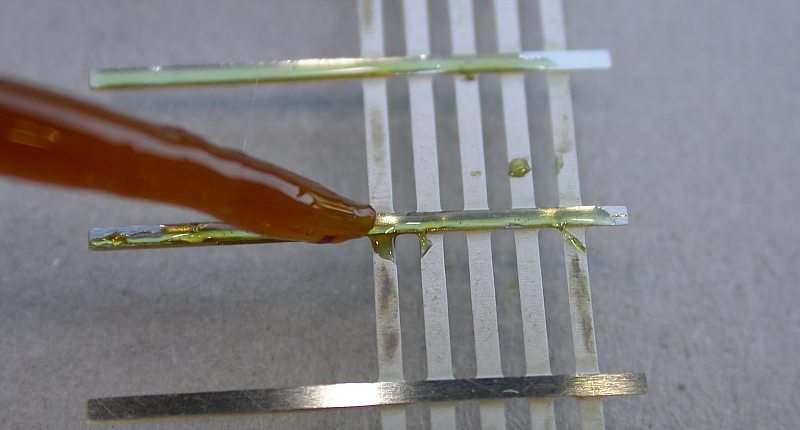
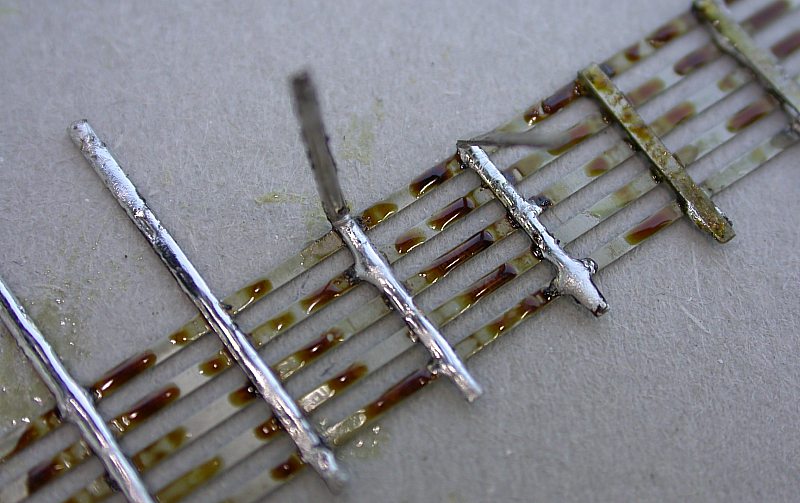
3. Take a section of fence and lay it onto it's "board side". So the poles will lay upwards. Now apply flux onto the
poles, take care only the poles will receive flux because during the soldering operation the solder will follow the flux.
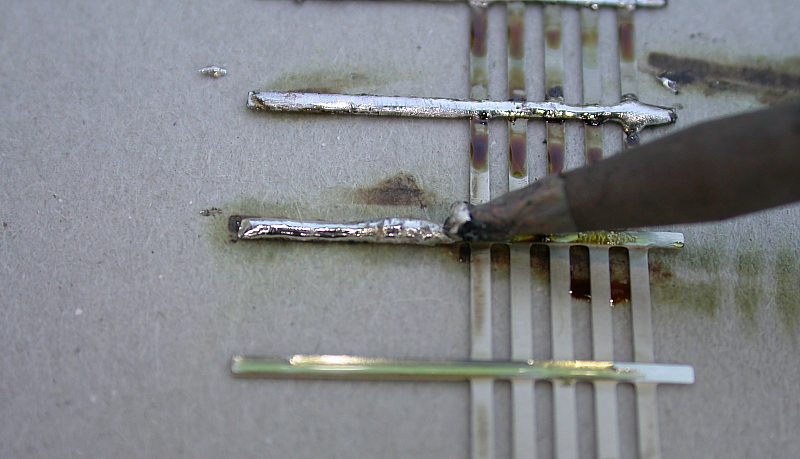
4. Next step is soldering of the poles. The entire upside of the pole gets a layer of solder. Then fold the pole from
the longer side to the short side. Use a cleaned tip of your soldering iron to solder both sides together. Use a tooth
pick to press the parts together during soldering.
5. The gates are done in a similar way. Also here a greater pole thickness is achieved by folding and soldering. If
you like to model an open gate you have to cut on one side.
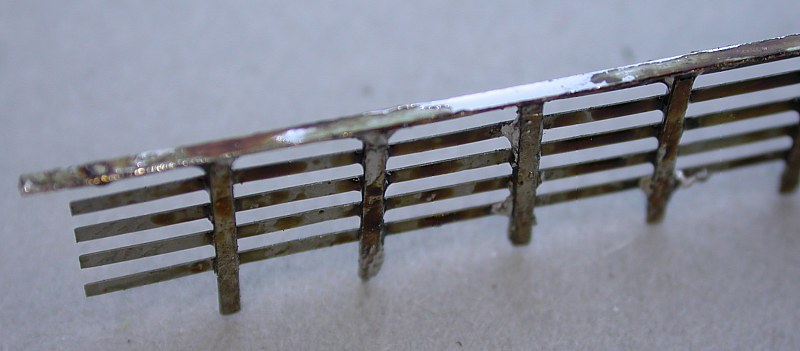
6. With the sections of fence and the gates you will create your cattlepen. The boards of the fence always show to
the inside, the poles are at the outside. Solder the boards to the gates. To create corners bend the fence at a
pole. For T connections always start at a pole. In case the T joint needs to start between two poles use the pole
of the diverging fence section.
7. Solder the top boards on the fence. Cut the boards in sections as long as the distance between two poles at the
fence section.
8. Solder the sides of the ramps in a similar way than the fences. The loading ramps are designed for large height of
the rail. In case of lower difference between top of rail and floor of cattlepen cut the ramps to fit. Right and left
side of ramp are soldered to the bottom of the ramp. Again the planks will be at the inside.
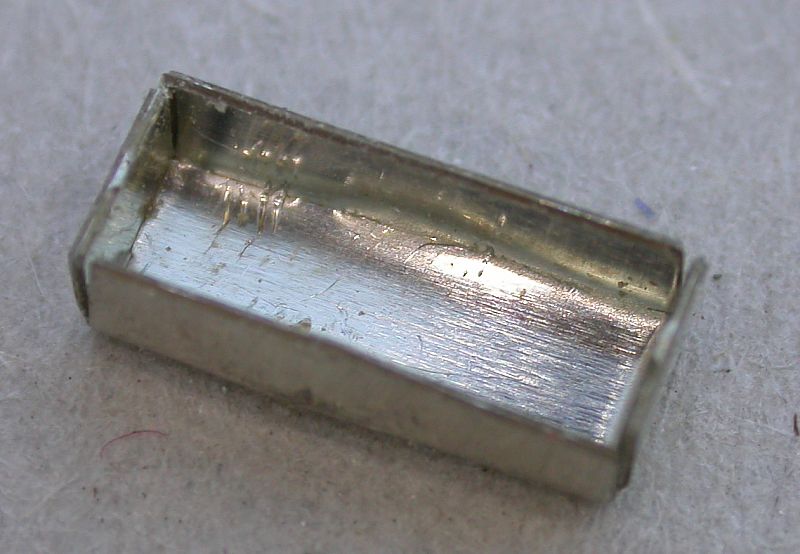
9. The troughs are folded. The folding lines need to be inside. Solder the troughs to seal them.
10. Now clean your kit from flux and degrease. Then use metal primer for a first layer. When the primer is dried use
hobby paints for colouring your kit. The colour of wood varies from dark brown to light grey depending on the type
of wood and the grade of weathering.
Have fun with your kit! |